Showing posts with label Marine Technician. Show all posts

Wednesday, 2 December 2015

THE ART OF FIBERGLASS REPAIR PART 3 / HOLES


http://boatnutmagazine.com/


HOLES IN MY BOAT /  Fiberglass Part 3 How to fix holes in the fiberglass

This happens on every boat over time we either install new canvas, electronics or snaps pull out of the deck, and there you have it a hole. I will be it a small hole but these are the most common holes in a boat. There are a few steps that need to be taken in the case of any small holes in the fiberglass of your boat.

Do not leave these holes unattended as this is a place were moisture will enter and start to break down the lamination, and worse yet if core is exposed create a place for wrote to set in!
  • The first question you need to ask is are you going to drill a new hole in the same place.
  • Are there stress cracks around the hole.
  • What color are you going to have to match. (If you don't know contact the manufacturer with Hull ID Number)
  • How large is this hole.
  • How many holes are there and are they all in one area
  • Can you get to the back of the hole(s)
  • Is the hole into some type of structure ( is there wood core at the bottom of the hole)

Each one of these answers places a role in the repair you will have to complete,  For small holes the procedure is straight forward. You will need a few tools and supplies:

  • Drill with a large rasp bit with a rounded end
  • 120 sand paper,  400, 600, 1200 wet and dry sand paper
  • A small trowel ( I like an oil paint trowel the long one with a rounded tip)
  • Acetone
  • Clean rags
  • Pencil
  • 3/4 inch masking tape (blue)
  • Polyester resin c/w catalyst
  • 2 Small mix cup
  • Clean mix board (a clip board works good)
  • Pre Val Sprayer
  • Masking paper
  • Buffer and compound ( I make my own compound) a supplier will advise what they have
  • Color Match gel coat
  • Cabosil
  • Small sanding block
  • Patch Aid (speed will be fast)
  • Milled fiber or Chop Strand fiberglass
  • Water spray bottle
  • If you choose you can purchase a premix color match gel coat patch kit ( your local fiberglass supply company can advise you if this is available)
Some advice from over 39 years and being a top rated fiberglass tech, forget all the BS about needing to use any  thing other than Polyester resin. If the area were the hole is requires more than what this repair procedure out lines such as water or dry wrote you will need to consult a pro or get further information on procedure to repair. You need to know that epoxy and vynlester resin do not bond to polyester resin unless you provide a mechanical bond. You will pay more for fancy resins and they are NOT, I repeat NOT healthy for you to use! Do not let anyone bull shit you.


Procedure to Repair:

  1. With your drill and the rasp tip, put the drill in reverse. The reason for this is that in forward with a sharp rasp you can simply bore a bigger hole in the area you are trying to fix. On slow speed you will place the rasp dead center of you hole and remove some of the gel coat and some of the pink fiberglass behind it. You are looking to create a clean dimple were the gel coat has a nice tapper all the way around. It should look like an over size golf ball dimple with the pink fiberglass and drilled hole in the center, at the bottom of this dimple.
  2. Around the hole with 120 sandpaper on a sanding block remove the shine for 2 inches all around the dimple. Do not make a hollow around the dimple simply remove all shiny gel coat surface.
  3. Clean the area with acetone and rag, remove all dust and be sure to let some down the hole. Acetone not only cleans the surface but it drives moisture out.
  4. If you are certain that you have removed any chipped or cracked gel coat than you can now get your masking tape. Mask around the hole half way onto your sanded area. You should have 1 inch of sanded area showing around the dimple and 1 inch under the tape. Make the tape line two layers thick. this will allow for the fill gel coat to shrink during curing.
  5.  If you can get to the back of the holes mask over the area so resin doesn't drip out onto what ever is below the area. Mix up some milled fiber with resin following the manufacturers instructions, add you catalyst and mix again. Take this mixture and stuff the actual drilled hole only, do not fill the entire dimple. Allow to cure completely and again with the drill running backwards clean up the dimple and wipe with acetone. You should now have a dimple without a drilled hole at the bottom.
  6. Mix up your gel coat and cabosil combination until you have the consistency of peanut butter, add your speed patch and if the fill gets to runny add more cabosil until you have a peanut butter consistency again. This fill must be just like smooth peanut butter, take a large enough amount of fill, (to over fill the dimple) place it on the mix board and add catalyst, you must be sure the catalyst is mixed all the way thru the fill. Take your trowel and fill the dimple to the height of the masking tape , create a nice even top to the fill area and immediately remove the tape. clean your trowel with acetone and a rag.
  7. Allow to fill cure completely. If you have added patch aid, the fill will be dull and not sticky to the touch when cured. Run a dry buffer over the fill before you sand this will pre shrink the fill. take your pencil and write all over the repair area, you will use this as a guide to see when your flat and fair. With your block sand down the repair area with 120 sand paper until surface is even or very close to it.
  8. You now have two chooses you can spray the repair area or sand it out and polish, if you choose to sand it out grab a pencil and write all over the area that you have sanded with 120 and now sand with 400 wet and dry with water ( use your spray bottle and add a few drops of dish soap), use a sanding block and sand until the pencil marks are gone repeat with 600 and 1200. When you are done simply buff the area up and check the results.
  9. If you do not like what you see sand the area down with 120 and follow the next procedures. In some cases just the fill and finish works great, this is usually based on the gel match quality.
  10. If you intend to spray you will leave the area at the end of the 120 sanding, clean with acetone and mask an area of at least 6 inches by 6 inches, this area must be sanded slightly larger with 120 sand paper. Mask the area spray off allowing the masking line to be just inside the sanded area place masking paper around the spray area use the masking line as your guide.
  11. Grab your Pre Val sprayer read the instructions and take the glass jar and lid out. you will mix the color match gel coat and patch aid per mixing instructions this will seem like a thin mixture do not compare to paint. You can add a small amount of acetone but only if necessary to thin down not to much it can yellow the color. Place the lid on and shake the mixture now you can add your catalyst. You will have about 5 min max to spray and clean the Preval Sprayer. Grab a clean rag with acetone and wipe the spray area again just before you spray ( to get ride of dust). Hold the Preval back about 8 inches and start in the middle and spray your way out tapering the spray towards the tape line this is important. Usually three or four passes will work. Remove the tape and masking paper right away. Allow to cure completely. To clean the Preval simply dump out the gel coat in a jar and fill and spray acetone through the Preval
  12. Once the spray area has cured. You will use the same pencil trick write all over the repair area only this time you will only sand with the 400, 600 and 1200 wet sand papers with the water bottle. Once you are completely sanded buff and clean up. This method not only fills the hole but will last as along as the boat and you can re drill this very spot again in the future.
Any of these steps can be repeated if necessary to create a good fill or good spray, Step by step video will be available in our spring Magazine. Look for it and buy it on line!!!!!
 If you have several holes together simply treat each hole individually and make your spray area over the entire area as one. The truth is 90% of a great repair is in the color match, if you are not that fussy about the match the repair will last and the fade from the sun will eventually make the area harder to see over time. Just buy quality materials!


If you read our blog on colored hulls it goes into more detail on how to buff to a factory finish...

                                                                                                                    Author BW

To guarantee access to all of  Boat Nut Magazine articles, pictures and featured services visit the official Boat Nut Magazine ©™ website. Be sure to reply to the Boat Nut Association registration on our site for the latest Boat Nut weekly and monthly news letters and opportunities.


Copyright 2015 © Boat Nut Media, Toronto, Ontario. All rights reserved. No part of this information/publications may be stored in a retrieval system, transmitted, or reproduced in any way, including but not limited to photocopy, magnetic, or other record, without prior agreement and written permission of the publisher, Boat Nuts Media ©™ No liability is assumed with respect to the information provided.  

Wednesday, 18 November 2015

SWIMPLATFORM EXTENTIONS


http://boatnutmagazine.com/


           SWIMPLATFORM EXTENTIONS


It is popular now a days to modify our boats and add the accessories that we see on new boats, to change the issues that older boats were plaiged with in the 80s and 90s. Boat owners are doing things as simple as changing to LED lights right through to adding oversize swim platform extensions and everything in between. Trying to create a more up to date and usable boat, is this a good idea? Will these type of modification affect the performance of the boat (both mechanical and ride performance). I have operated a few boats where the addition of accessories had completely destroyed the performance of the boat. Unfortunately it always seems to be the first time boat buyer who ends up owning these boats, the seller knows the boat is no longer performing but the new boater has nothing to compare the boat to and assumes the ride is natural.

What are the problems associated with installing accessories like swim plat forms, radar arches, generators, extra batteries and other weight and load changing items to our boats. All boats that come to market are designed with several important standards and measurements in mind, these include floatation, center of gravity and load weight balance. The boats are engineered and weighed with full loads this includes fuel, fresh water, batteries all of the systems that the boat was designed to have and use from the factory. Changes to any of these measurements will change the way the boat handles and performs.

 By adding weight you affect the way the boat sits in the water when at the dock. This can include a list to one side, a drop in the water line (aft, forward or over all). These change can and will affect exhaust flow, safe height for thru hull locations from the water line, proper operation of bilge pumps, and of course the ability for floatation that the manufacturer installs to work correctly or at all. In the case of a list many boaters try to counter act it by adding more dead weight to the high side making the situation worse. The moment that you have changed the load enough to create a change at the water line you have changed the way the boat will perform. Keeping in mind I have not allowed for all your personal items you keep on the boat and for some boaters this can be the equivilent of a pick up truck load of items of all shapes, weight and description.

  Lets go over the main items we add to our boats now a days to make them more up to date:


Swim platform extension: The first question you need to ask is did my boat come with this option what was the size and how was it mounted. Am I running the correct engine package combination to accept this accessory. Quite often the boat you have did not have the platform added at the factory due to the fact that the boat has V6 power rather than V8 power or you may have a single engine rather than a twin engine combination. Possibly the boat came optioned with a bundle of accessories that you don't have and this could include counter weight items that are moved forward such as a generator in front of the motors to offset a heavier transom load. If you are planning to add a platform to a boat that did not come with this option here are the things you need to consider.
  • What is a reasonable size. You may want a patio back there but can you see it from the helm, how much extra in slip fees will this cost you as you are changing the length over all. What are you really using the swim platform for, is it just to make boarding the boat easier and are you looking to mount a BBQ. How will this change the way I tie my boat up during bad weather
    .
  • How much does it weigh. Load weight right on the transom is one of the evasive changes to a boat you can make. The reason for this is you are directly affecting the center of gravity. This will change the way the boat planes, the affect of the trim tabs and drive trim. The depth of water the drives are in at the dock, and the exhaust flow. If you have thru hull exhaust you can sink the ports under the water completely or only part way either is not a good thing. this can increase the back pressure on the motor, and possibly leave the mufflers full of water at all times. In the case of and inboard out board it will change the height of the exhaust water in the bull horn ( the exhaust outlet at the back of the motor) outing stress on the flapper valves and increasing the opportunity to hydrolic the motor on shut down or while backing up. Both of these situations are expensive to repair and can blow a motor.  

  • How will the hull run after. A swim platform can create several bad situations if it is not designed to match the boat correctly. If the platform is mounted down low two important effects can happen. the first is suction this is when the bow of the boat starts to lift and the platform is right down in or at the surface of the water, this creates a vacuum effect were the boat has to power past and pull the platform out of the water. When this happens the boat lays bow up for way to long and with out enough power will not plane at all. The second is the following sea scenario were the platform act like a trim tab and lifts the back of the boat out of the water. As the waves roll up behind they get under the platform and have no were to break so it just lifts the boat up and can create a situation were you can no longer control the boats direction. This same situation will show itself while trying to back down or if you are floating or at anchor. The boat can actually come right around on you and you will be facing the direction you were coming from in a second!

  • What will it be mounted to. There are three ways to mount an extension, over the platform, under the platform or directly to the transom. Most over platforms mount this way to prevent the trim tab effect, the silly part of this is the platform is useless as the platform sits a foot or more out of the water. they look more like a back deck than a swim platform. The second is under mount this is generally how the factory installs platform extensions. it is clean neat and functional, But you need to restrict the size try to stay close to the factories sizes any more and you will probably find it floating past you one day. You must be sure that all the interior support structure is in the boat to do this as the bolts go up through the bottom of the platform hull area. Just because the boat was designed for this does not mean that the support structure is in the boat. The third is way is to mount right to the boat transom, picking the right height and being sure that the structure of the transom is solid is important. You do not want to half ass this mounting set up. Quite often there are issues with this set up as a larger platform will require different bolt patterns and support bars. Check the engine compartment first you may have steering bars, pumps, or your motors may be so close that placing support bars were they need to be maybe impossible. Try to remember that in some cases the reason for the factory installing small platforms is an engineering issue not just due to the fact that they were not wanting to do more.

  • What do you want the extension for. If you want a functioning platform than you probably will not like the over mount platform at all, the platform can be unusable for swimming and re boarding. This falls into a safety issue as well if you have high decks or deck sides you need to be able to get down to the water in the case of an accident. It would be ridiculous to attempt to get a hurt person up more than a foot out of the water on this type of platform. In some cases that the re boarding issue, if you feel over board was the only reason the factory put any platform at all on the boat. Not all accessories were created for there good looks they just had to function. If you are just trying to add length seriously sell the boat and buy a bigger one.
Just do not assume that the extension you buy or have built will work you need to consider a lot of things before you slap three feet of floor on the back of your boat!   It can turn out fantastic or be the biggest failure and destroy the performance characteristics of a great boat.
    Davit Systems fall under the same rules as adding a platform they are both transom load weight additions. You must make the same considerations to the boat in either case, The difference with a davit system is that you can calculate the weight load and have a marine engineer or the manufacturer inform you of its feasibility and the effects of the weight. If you buy a boat with a davit system be sure you find out the recommended load before you just load your sea doo or tender.

      To guarantee access to all of  Boat Nut Magazine articles, pictures and featured services visit the official Boat Nut Magazine ©™ website. Be sure to reply to the Boat Nut Association registration on our site for the latest Boat Nut weekly and monthly news letters and opportunities.


      Copyright 2015 © Boat Nut Media, Toronto, Ontario. All rights reserved. No part of this information/publications may be stored in a retrieval system, transmitted, or reproduced in any way, including but not limited to photocopy, magnetic, or other record, without prior agreement and written permission of the publisher, Boat Nuts Media ©™ No liability is assumed with respect to the information provided. 
       

    Tuesday, 17 November 2015

    Gelcoat Damage- Below the waterline


    http://boatnutmagazine.com/

    GELCOAT DAMAGE BELOW THE WATER LINE.  How serious is this?

     When you pull your boat at the end of the season it is not uncommon to find chips, scratches and gouges below the water line. The question is do the repairs really require immediate attention, the short answer is yes but not right away. I will explain!

    First lets cover why you would wait to complete the repair this time of year. When you hauled your boat out, the hull was and still is wet. Every hull has a moisture content or the amount of moisture the lamination has managed to pick up. Each hull will have picked up a percentage of moisture content over the years. In the case of a new boat the humidity may have been very high the day that they laid the fiberglass material in your boat, thus creating trapped moisture there from day one. Not to worry any thing below 6% is considered very dry. There is a tool to measure this level of moisture, (moisture meter). Surveyors love them, but half the time they are not calibrated right or the operator doesn't know how to read it correctly.(Moisture meters are a whole other topic we will get into later). In the winter weather conditions are dry after the freeze, dry cold air, this air will help dry out the damaged areas in preparation for your repair(s). Drying the hull will make for a higher quality repair! The dryer the repair area the more likely it is that the bond of the repair will be better and the gel coat patch will not become contaminated. So take advantage of the cold dry winter weather, let it dry out the damaged area.


    So what's the big deal a couple of chips cant be that bad? There are two common trains of thought.
     1- Fiber glass cannot rot
     2- Fiber glass is water proof.
     Both of these statements are incorrect. Fiberglass material can rot. This happens when the material gets so damp that mold and mildew starts to break down the mechanical bonds between the layers of material used to build up the thickness of your hull or deck. You can actually pull the black rotten fiber glass layers apart like a layer cake. Water will also break down the resin which surrounds the  fiberglass strings in the material.( There is a tell tale sign that this is happening. The water in the material starts to smell like vinegar when you break through to these areas). This is called wicking, the water will break the resin down and actually flow up hill from the water line toward the deck and hull joint.

     The second misinformation is that gel coat is water proof, it is not! As soon as you breach the resin rich surface, the gel coat can be penetrated by water and this causes damage such as blisters and high moisture content developing and spreading through the hull. (A foot note: When you sand the bottom of a boat in preparation for antifoul you are breaching the resin rich surface. There are several great sand less primers on the market, use these product instead of sanding. You will need to use the same brand of primer and paint. I have done over a hundred bottom paint jobs this way in the Pacific North West and it will work great provided all instructions are followed). Maintaining a resin rich and unbroken gel coat layer below the water line is very important to the life of your boat.

    Back to the question, Yes these repairs below the water line are important to complete for the above mentioned reasons. Any repair work below the water line should be your priority, just remember that the outside of the hull is not the only area to the hull which can be chipped or damage. Boat owners often over look the inside of the hull in the bilges, damage in these areas have the same effect on the hull as exterior damage as the bilge usually always has water laying around in it. The hull will draw moisture from the inside or out. Damaged gel coat (referred to as base coat on the interior of the hull) can also lead to rot of structural components and water contaminating the floatation foam areas.

    Where do these little chips and gouges come from? Well there is an answer for this. Most of the damage will come from haul out and launch. If you are using a trailer then you know how easy it can be to make an error in judgment and get on the trailer wrong and hit the trailer. If you are using a travel lift then little rubs and damage can occur. Areas that are exposed in most cases are the factory voids. These are areas where they did not roll out the material behind the gel coat very well and these areas have opened up. We refer to these areas as air voids, this type of damage is very common on edges of lifting strakes and hull steps where there are tight 90 degree edges that the material must try to lay in. Of course you may have ran over some debris that was just below the surface or hit the hull with fishing equipment such as down rigger weights. The most common damage to the hull, bar none is beaching damage. The boat owner will run the bow up onto the sand. Causing the gel coat on the keel to be sanded away leaving and exposed area of material along the very bottom of the boat, this area could be several feet long and several inches wide (if this is common practice for you consider a keel guard purchase or have an extra couple of layers of gel applied in this area).


    While we are on the topic of hull damage and the importance of  keeping the area below the water line in good repair, lets briefly touch on epoxy barrier coating. One of my pet peeves, an oversold expensive product that does work, yet is applied more times than not, for no reason at all. Barrier coats are designed to prevent moisture penetration, this makes sense for new boats that have not been in the water for years. Dry hulls definitely benefit from a barrier coat system. However keep in mind if it won't let water in, then it only makes sense that it won't let water out. So if you apply it to an older boat not only are you are trapping the moisture content in the hull, but you are eliminating the possibility of air drying over the off season. You can dry the fiberglass material out before you install the barrier. This will require stripping all of the gel coat from the waterline down (a massive undertaking), having a controlled environment and several days with heater pods to dry the material. ( Just ask Black Line in Sydney BC they are the very best at blister repairs). So it may make you feel better. But are you not throwing your money away by barrier coating an old hull? Just think about it! If you currently have a barrier coat then it is important to remember it too must be repaired if you have gel coat damage.

    To guarantee access to all of  Boat Nut Magazine articles, pictures and featured services visit the official Boat Nut Magazine ©™ website. Be sure to reply to the Boat Nut Association registration on our site for the latest Boat Nut weekly and monthly news letters and opportunities.


    Copyright 2015 © Boat Nut Media, Toronto, Ontario. All rights reserved. No part of this information/publications may be stored in a retrieval system, transmitted, or reproduced in any way, including but not limited to photocopy, magnetic, or other record, without prior agreement and written permission of the publisher, Boat Nuts Media ©™ No liability is assumed with respect to the information provided.  

    Saturday, 28 March 2015

    Basic boat prop knowledge


    http://boatnutmagazine.com/


    How does a boat propeller work?


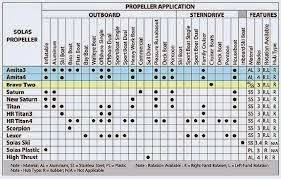
    Every prop has two numbers to describe it. The two numbers are pitch and diameter. The other part of the prop is the hub, the hub is the area where the prop shaft is attached. There are three types of basic props we use on pleasure power boats and they are aluminum, stainless steel and brass. Each of these materials has special issues that are associated with its use in prop construction. Aluminum and stainless are the standard on outboard and inboard/outboard configurations where brass is used on inboard configuration. All three of these materials can be repaired with in limits.
                                               

    First we will cover Pitch 
     The first number of two marked on the prop. Pitch describes the angle of the blades. A slang term for a prop is the screw and this is for good reason, like a screw  being turned into wood each turn moves the screw a measured depth in the wood. Pitch determines the amount of forward distance the prop travels for each revolution the prop makes. Pitch is measured in inches so a 15 pitch prop moves 15 inches through the water with every complete rotation. Pitch describes two things in layman's terms, imagine the pitch number describing the ability to gain traction, the lower the number the better the take off from a stand still (hole shot) your boat will be. Pitch also could be considered like a gear arraignment the lower the number the more robust the teeth on the gear would be, in other words there is less chance of skipping teeth when you suddenly increase the rotation(speed and torque) speed.

    Pitch affects the top speed the boat can produce, the fuel burn your motor uses, and the pulling or pushing power that the boat can provide when the boat is moving from a standing start (hole shot).

    Speed
     This is obvious if the prop will move 15 inches with every rotation and the identical motor and boat has a 19 pitch, the 19 pitch moves 4 inches through the water further than the 15 pitch prop. However this is not an unlimited number as the motor will only provide a maximum number of revolutions of the prop, the pitch becomes limited. You could not have a 40 pitch prop as you would never grab enough water to move at all as the prop would simply act like a blender and air the water and spin with no real effect. This is called cavitation, to much cavitation simply boils the water and burns the edges of the prop. So there are a select number of pitch combinations for each motor and boat combination. The magic is to find the prop which gives you the best hole shot (standing start) and the maximum top speed based on the top rpm that it is safe to run the motor.

    The next number is diameter 
    This is the distance from tip to tip of the prop. The diameter is also a restricted number, as it is restricted by two other items. The diameter of the prop is restricted by the size of the prop shaft. If you try to turn a large diameter prop on a small prop shaft that prop shaft will snap. The torque that the prop places on the shaft would stress the shaft causing the shaft to twist or snap it some where close to the back of the prop. The other item that affects the size of the prop is the location of the anti cavitation plate, this is the flat plate directly above the prop on your gear case. This plate is designed to be even with the water height that is created from the bottom of the boat when you are on plane. If this plate is too high or too low you will not achieve maximum performance of the motor or the boat. This plate also stops the water from simply flying out above the prop creating the maximum forward thrust that the prop develops. You do not want to have a prop which is so close to the plate or the hull that the water cavitates because it cannot pass through the gap between the prop and the anti cavitation plate. In the case of prop being close to the hull you could if you hit something cut a gash through the hull of the boat. These are the reasons why you are generally restricted to one or possibly two diameters you can use.
                                                                   
    The last part of the prop we described is the hub, this is the center of the prop were the blades start and the shaft penetrates the prop. There are different types of hubs on power boats, the hub is designed and dictated by the prop shaft and or gear case. in the case of an outboard or conventional inboard /out board the hub of the prop has exhaust gases that pass through this area. This is why when the water is clear you can see a trail of bubbles leaving the center of the prop. The hub of this type of prop is the same size as the gear case with open passages through the hub. There are two styles of these props, the break away hub and the fixed hub. You will only be able to determine the type you have by removing the prop off the shaft. When you remove the prop on the inside of the hub you may find a hard plastic block with a hole and splines for the shaft to pass through it. this block is designed to break away if you impact the prop to reduce the prop damage and the possibility of damaging the gears inside the gear case. The fixed hub does not have this plastic block and therefore if you impact the prop you will surely damage or break off the blades and possibly damage the gear case. A racing gear case on an outboard or inboard /outboard has a solid hub similar to an inboard configuration as there is no exhaust port requirement..

    Prop materials
    are aluminum, stainless steel and brass. On an inboard or inboard outboard configuration the props are made out of aluminum or stainless steel, why is this? The aluminum prop is a soft material which will easily change shape or break away under impact, this is critical to protect the inner workings of the gear case. The disadvantage to an aluminum prop is that the blades flex under load so the pitch is not a constant as you power up or are pushing the boat through heavy sea conditions. The pitch on an aluminum prop will change over time they are not reliable to always remain the same as they were made, affecting performance and fuel burn. Stainless is the next material, it is stronger and rigid so this material gives you reliable pitch through its life and while you power up. The blades do not move around. This great for performance however if you impact the prop you can damage the gear case workings. The stainless prop is more durable and less apt to be as immediately affected by corrosion. The last material is brass which is what the inboard configuration has, brass is less flexible than aluminum and not as durable as stainless. The perfect material for props that you cannot see. If you impact the blades they will flex and break away to help protect the rest of the running gear. One of the disadvantages to brass that the pitch can change with high hours of use, so it is a maintenance item to have your props tuned on a regular schedule. Doing this will keep the performance you should expect and the fuel burn correct. A prop tune is not expensive and will pay you back in fuel burn.
                                                             
    Props come in several ways, there are the number of blades, the style of these blades, and the direction of rotation. There are also right hand and left hand rotation. On small outboard motors you will have two blades on more power full outboards and inboard/out boards you will see three and four blade props, the same as inboard configurations.You also see dual prop configurations on more current boats. The amount of blades can assist in achieving the best performance for a hull design, and weight. A four bladed prop can be more efficient in providing pull out of the hole and something called transom lift providing quicker hull planing capabilities. When we talk about left and right hand props this is the direction of the rotation of the drive shafts. When you have a twin configuration you are looking for the starboard drive or shaft to be turning right hand and the port providing you with left hand rotation there is a reason for this set up. In a single motor single prop the boat has a natural tendency to pull to the right going forward and to the left in reverse, by having a counter or left hand rotation on the left side it counters this natural reaction. Which creates a more manageable boat to operate. Twin with right and left hand rotation also provides transom lift, because the props turn in against each other there is a channel of water which is pushed straight down lifting the hull out of the water. This is taken advantage of the most with performance boats where the distance between the props is very small. If you have a twin that has two right hand drives there is a high chance that the drive on the left has been changed, the boat will never perform to it maximum at all. All left hand props are marked with an L, right hand props are not marked.
                                                 
    Choosing a Prop for your boat requires some calculations which Mercury or Volvo can provide you with based on your specific configuration. If you still feel that you can get a little more out of a prop then a prop repair person can put an extra half pitch in the prop, and yes this does work, you can get a real gain in a half pitch custom set up. Knowing if you have the right prop is an entirely separate topic to cover. When you read the numbers on your prop a 17x19 is a 17 pitch 19 inch diameter, a 17x19L is a 17 pitch 19 inch diameter left hand or counter rotation prop. These numbers are either on the side of the hub or on the end of the hub. If you are not sure a prop repair person can tell you what you have.

    There is a mass amount of science to prop construction, materials, and selections. This article was simply to cover basic information, to create a basic understanding. A duo prop drive has one prop turning right and one turning left, so a single duo prop will not have the natural pull to the left or right. Duo prop provides a more stabile steering and control platform. IPS and the new forward drive are all duo prop configurations. If you need more information on props Mercury is running information this year on this topic.


    Ask BNM about our new 2015 Services


    To guarantee access to all of  Boat Nut Magazine articles, pictures and featured services visit the official Boat Nut Magazine ©™ website. Be sure to reply to the Boat Nut Association registration on our site for the latest Boat Nut weekly and monthly news letters and opportunities.


    Copyright 2015 © Boat Nut Media, Toronto, Ontario. All rights reserved. No part of this information/publications may be stored in a retrieval system, transmitted, or reproduced in any way, including but not limited to photocopy, magnetic, or other record, without prior agreement and written permission of the publisher, Boat Nuts Media ©™ No liability is assumed with respect to the information provided.


    Monday, 23 March 2015

    Telemarinetech part 2 BNTN Program


    http://boatnutmagazine.com/


    Telemarinetech the best tool you will have as a boater, we field all questions you may have!

    Please Email boatnutmedia@gmail.com to receive more information and an application

    You can read over the information and look at the application before you commit to the program, There is no limit to the amount of times you use the service. Any question any time BNTN is the perfect addition to your boat ownership plan. Boat Nut Media guarantees your satisfaction or you will get a full refund. The specialists that will help you are hand selected marine technicians who can explain your answers in an easy to understand language.

    You now have an expert available to you 7 days a week, Our specialists believe that any question is a good question we want you to be informed about your boat, because when a problem comes up you are usually on your own. It is rare that you have a problem with an expert on board with you. The idea for this program stems from the days when I was in the boat service business, My clients were able to call me anytime, my phone used to ring over 21 times before noon almost every day from boaters who had questions ranging from mechanical failures to what size anchor do I need. With break down questions we could get the boat running 99 percent of the time over the phone and save the boating day or trip! Telemarinetech is not trying to take the place of your marine mechanic ,we are designed to be a support program for you.

    This program is ideal for  New Boaters who are just starting to boat, Boaters who cruise distances, and Experienced Boaters who just need to make inquires to verify that what they are dealing with is accurate. We can take the time with you that a service technician cannot always give you


    Telemarinetech/ BNTN details at boatnutmedia@gmail.com
    on our blog, and on twitter @BoatNutMedia

    To guarantee access to all of  Boat Nut Magazine articles, pictures and featured services visit the official Boat Nut Magazine ©™ website. Be sure to reply to the Boat Nut Association registration on our site for the latest Boat Nut weekly and monthly news letters and opportunities.


    Copyright 2015 © Boat Nut Media, Toronto, Ontario. All rights reserved. No part of this information/publications may be stored in a retrieval system, transmitted, or reproduced in any way, including but not limited to photocopy, magnetic, or other record, without prior agreement and written permission of the publisher, Boat Nuts Media ©™ No liability is assumed with respect to the information provided.

    Sunday, 22 March 2015

    TeleMarineTech


    http://boatnutmagazine.com/

    Your TeleMarineTech Appointment


    Contact:
    BoatNutMedia@gmail.com


    Overview of a Marine TeleMarineTech appointment
    . . . just like a regular Marine Technician service inquiry appointment


    You have got to the boat on Sunday and it won't start, you are on the lake and have an alarm going off, you have a service question or need advice about the boat, your boat has broken down and you want to verify the information a service provider has given you, is the estimate for repair accurate, you are looking at buying another boat? You will meet using Boat Nut Telemarinetech Network, BNTN uses video conferencing to connect you so that you will not have to worry about were you will receive non bias assistance. This will reduce the time, cost and stress associated with a sorting out a service issue and boat ownership.

    What is a TeleMarineTech visit?

    Telemarinetech uses video cameras, and Skype/Zoom services to connect you to marine specialists who are not located near you, reducing the need to locate and wait for a service appointment and receive assistance the assistance you urgently need. You will be able to see, hear and talk to a certified technician or other marine repair professional. (not all marine trades are recognized with certifications, "specialist")
    How does a Telemarinetech service visit work? 

    A telemarinetech appointment is just like a regular service appointment; only the specialist you will be seeing and speaking with is on your monitor.


    Before you call, the specialist will require the hull ID number and the Serial numbers for your motors, drives, relevant information about your boat to support your telemarinetech visit. However you may be asked to provide assistance with tests for results. The video conference connection is made with the specialist at a different location and the visit begins.


    The marine specialist may request your assistance or assistance with your camera to provide video, to complete the examination. The specialist on the monitor can hear an alarm, see broken parts and use your assistance to diagnose service questions the same as if he/ she were standing on the boat with you.


    Is there a cost for a telemarinetech appointment? 
    NO, You will not be billed for this service, if you are a registered Boat Nut. It is covered under the Boat Nut Membership Benefit Program "I AM A BOAT NUT".
    Is Telemarinetech private?
    Just like a regular service appointment, your Telemarinetech visit will be private and confidential. It can only be seen and heard by the specialist involved.
    Where can I get more information about Boat Nut Media?
    If you have any questions, please speak to a  boat  nut representative at 1-416-418-7433. You can also visit Boat Nut Media at www.boatnutmedia.blogspot.ca or Email BoatNutMedia@gmail.com.
    As a non bias power boat information and education provider in Canada, we feel by creating Telemarinetech service we are helping boaters get more out of their boat ownership experience. Providing more boaters with the care they need, were and when they need it. Our innovative use of todays and tomorrow's technology streamlines the service process, eliminating unnecessary wait times, assisting in an emergency and giving all boaters the same access to marine technicians and other marine professionals (specialist). Through our experience and insight, we have expanded the way knowledge is shared and how the marine community interacts. The information gained enables boat ownership budgets to go farther. For more information go to www.boatnutmedia.blogspot.ca


    BNTN  BOAT NUT TELEMARINETECH NETWORK  2015


    How to be a Boat Nut?
    Telemarinetech Service are available for Boat Nut Members; 7 days a week 7 AM to 9PM Central Time in Canada. You will be assigned a professional to assist you with your service question(s). 2015 Membership Fee are as follows: The same price as a screw driver set at Canadian Tire, BNTN Service is the most valuable tool you will have on your boat!

    One year Membership Fee $25.00 Canadian for the first 200 Members to sign up.

    After the first 200 members the full fee rate will apply $55.00 "I am a Boat Nut"

    Telemarinetech Services will be available starting April 7 2015, Services are only available in English.

    You will receive a BNTN Membership Card and access phone number (App is being developed will be available when complete)

    You will have to complete the application which will ask you basic questions Name, Address, Email, Boat ID number, Motor and Drive, and systems. We do this so we can develop base line information on your boat to make answering your questions quicker and more accurate.


    To guarantee access to all of  Boat Nut Magazine articles, pictures and featured services visit the official Boat Nut Magazine ©™ website. Be sure to reply to the Boat Nut Association registration on our site for the latest Boat Nut weekly and monthly news letters and opportunities.

    Copyright 2015 © Boat Nut Media, Toronto, Ontario. All rights reserved. No part of this information/publications may be stored in a retrieval system, transmitted, or reproduced in any way, including but not limited to photocopy, magnetic, or other record, without prior agreement and written permission of the publisher, Boat Nuts Media ©™ No liability is assumed with respect to the information provided.


    Spring start up / Boat Restoration 1998 280 Bayliner


     http://boatnutmagazine.com/

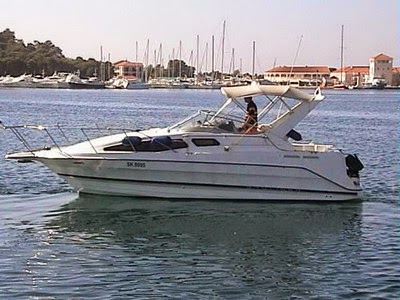
    BOAT RESTORATION  Project #1 1998 BAYLINER 280


    Boat Nut Media thought it would interesting to follow several spring start up boats this year, we have tried to select a cross section of different boats and budgets. Saving the dream! Boat Nut Media has selected a 2001- 410 Silverton Yacht (Sport Bridge),1998-280 Bayliner (Cruiser), 2001- 260 Sea Ray (Small Cruiser) and a 2010- Center Console fishing boat (Fully Rigged with Kicker, Radar, Down Riggers, all the toys)


    2015 Spring Project Boat  1998 Bayliner 28 Cierra

    List of spring work to be completed: 
    1- Restore the exterior of the alpha drive
    2- Replace the universal joints
    3- Alpha Drive spring service - Gear Oil, Water Pump, Prop Repair, etc.
    4- Gel coat repairs to hull on Port and Starboard sides and the back edge of swim platform
    5- Replace hull graphics
    6- Polish and wax the whole boat
    7- Repaint the wiper arm components
    8- Replace the haws pipe at anchor locker
    9- Replace the horn
    10- Replace the VHF radio
    11- Repair the wood grain dash all the printing is gone
    12- Replace the fridge
    13- Clean up the interior like new (remove mildew stains)
    14- Clean up and restore exterior upholstery
    15- Spring start up on 5.7 liter motor. Fluids, paint the works.
    16- Replace the dockside water fitting
    17- Replace the Bimini and install tonneau cover
    18- Full systems check and repair any failures 
    19- New bottom paint
    20- New prop

    After all work is completed there will be a sea trial and delivery to a new marina. The reason for all this work is the boat has only had 1 hour of operation time in the last 3 years. Boat Nut Media will video the boat at the start of the project, and take you through the project to completion. Work will begin late this week, we will upload videos every two days. If you have a similar projects on your boat you will see the products and procedures that are used to make this boat look like new again.

    Bringing this boat back to its former pride and glory will be a lot of work. This is one of those boats that begs the question, what do you do and were do I start? Do you let it go cheap or spend the time and money and bring the boat back to a clean reliable boat. There are a lot of these types of project boats out there and not all of them are worth repairing. Why do boats end up in this condition? Well for whatever reason the owner has not had time, has lost interest in the boat, or cannot afford the boat. How do you determine which boats to save? Boats like this one reach a tipping point, and this one is right on the cusp. Another year of no use and no interest would have pushed it over the edge. This is when the cost to repair starts to exceed the value.

    Here is an example of a 2010 Bayliner 260 after one season abandoned at the dock


    This boat was chained to the dock with a smashed out port cabin side window all of last summer. The boat literally was frozen when Boat Nut was asked to get it to the ramp! This boat will be for sale this year would you want to be the next owner? There are always tell tail signs of a boat that was abandon or let go. For information on how to detect this type of boat check out Telemarinetech Services from Boat Nut Media.

     If you get to this point you should have sold the boat the first year that you were not using it. If you do not have the budget, the time or the want to repair your boat sell it ASAP take the loss and walk away. Even one year of no use or hours really hurts a boat. This 28 Bayliner will take weeks of time and a large budget to bring it back to where it should be, the fortunate part about this story is the boat has been put away every year correctly. Boats that have been left by owners who have lost all interest rarely seek the correct seasonal services. So luckily in this case the important parts of this boat are still in good shape, the motor, the structure etc. So with the right planning this boat will be one to be proud of again. This boat is going to receive this work not for a profit but for the love of the boat.

    Fixing and flipping can be a risky proposition and you can be with the boat for some time. There is no sure thing. I have seen sure fire flip boats be for sale for three years you must be prepared for this or cut your losses.

    At the end the boat will either be loved again or it will be sold. No matter what the out come this boat is going to enter the second stage of its life.

     If you are a do it yourself boater this 28 Bayliner would have been a great candidate for a fixer upper, and that cannot be said for too many loss of interest boats out there. Do not be fooled by the story, the boat has had no use in the last couple of years so this boat will be in better shape than a boat that has been used regularly. That is bull, the boat that has been used and maintained will ninety percent of the time the better boat. If you are considering buying a fixer upper this project will be one to follow. You will certainly get a feel for what it takes to restore a mid size cruise.

    Boat Nut Media will include the costs of labor and parts for each step, giving you an idea of how much of a budget is necessary, and how to manage this type of project.

    Telemarinetech information is available on our next blog and at boatnutmedia@gmail.com

    To guarantee access to all of  Boat Nut Magazine articles, pictures and featured services visit the official Boat Nut Magazine ©™ website. Be sure to reply to the Boat Nut Association registration on our site for the latest Boat Nut weekly and monthly news letters and opportunities.


    Copyright 2015 © Boat Nut Media, Toronto, Ontario. All rights reserved. No part of this information/publications may be stored in a retrieval system, transmitted, or reproduced in any way, including but not limited to photocopy, magnetic, or other record, without prior agreement and written permission of the publisher, Boat Nuts Media ©™ No liability is assumed with respect to the information provided.